WPVibe is a powerful WordPress plugin that adds modern interactive features — live notifications, real-time activity feeds, and dynamic community elements — to any WordPress site. Whether you’re running a blog, a membership community, or a WooCommerce store, WPVibe can bring your site to life with minimal setup. In this guide, I’ll walk you through every step: from downloading the plugin to fine-tuning your settings for the best performance.
What is WPVibe AI?
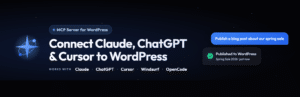
WPVibe AI* is a free WordPress plugin that turns your site into an MCP-ready server, so you can manage it by talking to AI assistants like Claude, ChatGPT, and Cursor.
it’s an AI-powered content generator designed specifically as a plugin for WordPress websites. Its core function is to help website owners, bloggers, and content creators automatically generate written content and images directly within their WordPress dashboard, significantly speeding up the content creation process.
Setup is quick*
Install the “WP Vibe” or “Vibe AI” plugin from http://WordPress.org, activate it, connect it to your AI client by pasting https://mcp.wpvibe.ai/mcp` into the MCP settings, and authorize the connection. Setup takes about 60 seconds.
Who it’s for
It’s built for developers and power users who already use Claude Desktop, Cursor, or ChatGPT and want to automate WordPress management with natural language.
Think of it as giving your AI assistant direct access to run your WordPress site for you.
Here’s what it does:
1. Connects WordPress to AI:
It acts as a Model Context Protocol [MCP] server for your self-hosted WordPress site. MCP is a standard that lets AI assistants connect directly to external tools.
2. Lets you control WP through chat*
Once connected, you can tell your AI things like “create a page called About Us”, “update a blog post title”, “upload an image”, or “run a health check”. The AI handles it directly on your live site – no need to open wp-admin.
Key Features & Capabilities
WPVibe AI offers a suite of tools focused on content creation and optimization:
AI Content Writing:
Generates various types of content, including:
Blog Posts & Articles:
Create full-length, SEO-friendly articles from a simple title or keyword.
Product Descriptions:
Useful for e-commerce sites to quickly generate compelling descriptions.
Social Media Posts:
Craft posts for platforms like Facebook, Twitter (X), and Instagram.
Ad Copy:
Generate persuasive text for advertisements.
Email Newsletters:
Draft engaging email content.
SEO Optimization:
The tool often includes features to help optimize the generated content for search engines, suggesting relevant keywords and meta descriptions.
AI Image Generation:
Some versions or plans allow you to create custom images and graphics using AI to accompany your articles, eliminating the need for external stock photo sites.
User-Friendly Interface:
It integrates directly into the WordPress post editor, typically as a block or a sidebar panel, making it very accessible for users of all skill levels.
Tone & Style Customization:
You can usually guide the AI to write in a specific tone (e.g., professional, friendly, conversational) to match your brand voice.
Step 1 — Install the WPVibe Plugin
There are two ways to install WPVibe: directly from the WordPress Plugin Directory (if it’s listed there) or by uploading the ZIP file manually.
Option A: Install from the WordPress Dashboard
- Log in to your WordPress admin panel and go to Plugins → Add New.
- In the search bar, type WPVibe and press Enter.
- Click Install Now next to the WPVibe plugin, then click Activate.
Option B: Upload the ZIP File Manually
- Download the WPVibe ZIP file from the official WPVibe website or your purchase confirmation email.
- In your WordPress dashboard, go to Plugins → Add New → Upload Plugin.
- Click Choose File, select the downloaded ZIP, then click Install Now.
- After installation completes, click Activate Plugin.
Step 2 — Initial Configuration
Once activated, WPVibe adds a new menu item to your WordPress sidebar. Go to WPVibe → Settings to begin configuration.
General Settings
- License Key — Enter your license key if you purchased a premium plan. This unlocks advanced features.
- Site Mode — Choose between Community, Blog, or Store mode depending on your site type.
- User Roles — Define which user roles (Subscriber, Author, etc.) can interact with WPVibe features.
- Notification Preferences — Set default notification delivery (in-app, email, or both).
Step 3 — Connect Your Database / API
WPVibe uses its own lightweight database layer to store activity data. By default it works with your existing WordPress database, but for high-traffic sites, a dedicated connection is recommended. Navigate to WPVibe → Advanced → Database Settings and review the following:
| Setting | Default | Recommended for High Traffic |
|---|---|---|
| Database Connection | WordPress DB | Dedicated MySQL/MariaDB |
| Cache Driver | None | Redis or Memcached |
| Queue Driver | Sync | Async (database queue) |
| Purge Logs After | 90 days | 30–60 days |
If you’re using Redis, add the following to your wp-config.php:
define( 'WPVIBE_CACHE_DRIVER', 'redis' );
define( 'WPVIBE_REDIS_HOST', '127.0.0.1' );
define( 'WPVIBE_REDIS_PORT', 6379 );
define( 'WPVIBE_REDIS_AUTH', 'your-redis-password' );
Step 4 — Add WPVibe to Your Pages
WPVibe offers two ways to display its components on your site: shortcodes and blocks (for the Block Editor).
Using Shortcodes (Classic Editor)
Paste any of these shortcodes into your page or post content:
[wpvibe_feed]                  — Activity feed
[wpvibe_notifications]         — Notification bell + dropdown
[wpvibe_leaderboard limit="10"] — Top users leaderboard
[wpvibe_badge user_id="1"]     — Display badges for a user
Using Blocks (Gutenberg / Block Editor)
- Open a page or post in the Block Editor and click the + icon to add a block.
- Search for WPVibe — you’ll see all available blocks listed.
- Click the block you want (e.g., Activity Feed) to insert it, then configure its settings in the right sidebar.
Step 5 — Customize the Appearance
WPVibe includes a built-in style editor. Go to WPVibe → Appearance to:
- Choose a preset color theme or define custom brand colors.
- Adjust font sizes, border radii, and spacing to match your theme.
- Toggle dark mode support (auto-detects system preference).
- Upload a custom icon set for notification types.
For advanced custom CSS, use the Custom CSS field at the bottom of the Appearance page. Changes preview live in the panel.
Step 6 — Test Your Setup
Before going live, run a quick sanity check:
- Open your site in a private/incognito window and log in as a test user (not an admin).
- Perform an action — like commenting on a post or liking an item — and confirm it appears in the activity feed.
- Check that notifications appear in the notification bell within a few seconds.
- Go back to WPVibe → Logs in the admin and confirm the events are being recorded correctly.
wp-cron). WPVibe relies on WordPress cron for processing queued events. You can verify this under WPVibe → Diagnostics.Step 7 — Go Live & Monitor
Once testing looks good, WPVibe is ready for your real users. A few final recommendations:
- Enable Email Digest notifications so users get a daily summary instead of individual emails.
- Set up the Weekly Activity Report to land in your inbox every Monday.
- Install a caching plugin (like WP Rocket or LiteSpeed Cache) and whitelist WPVibe’s dynamic endpoints to avoid caching issues.
- Bookmark the WPVibe → Analytics dashboard to track engagement trends over time.
You’re All Set!
WPVibe is now live on your WordPress site. With a few minutes of configuration, you’ve added a real-time activity layer that can dramatically improve community engagement and time-on-site. As your site grows, revisit the Advanced → Performance settings to scale up the queue and caching configuration.
Wpvibe is popular WordPress plugin that makes AI work for you from WordPress dashboard, if you you are new here don’t forget to visit our recent blog on👉 popular website to learn AI for free WPVibe is built to grow with you. Have questions or run into issues? Drop a comment below — I read every one.